Explore the unique functionalities of the Zmanda Management Console and take control of your data backup
Zmanda offers services to backup data that are truly a class apart when compared to the services offered by their competitors. With its ability to provide a sophisticated yet easy to use environment, the Zmanda Management Console allows its users to integrate diverse data backup strategies with just a couple of clicks.
Our previous article discusses the configuration of tape storage with the Zmanda Management Console. It comprises a simple five-step process that ensures secure backups to tape libraries, resulting in an effortless means to monitor data backup with complete ease. However, ZMC’s functionalities have a much larger scope. Apart from ZMC’s capabilities to support various underlying hardware for backup and immense tools for customization, ZMC equips its users with services that truly set them apart. ZMC offers its customers the best services with the ability to provide ZMC reports, custom reports, observe data integrity, vaulting, and the quick restoration of data.
Monitor
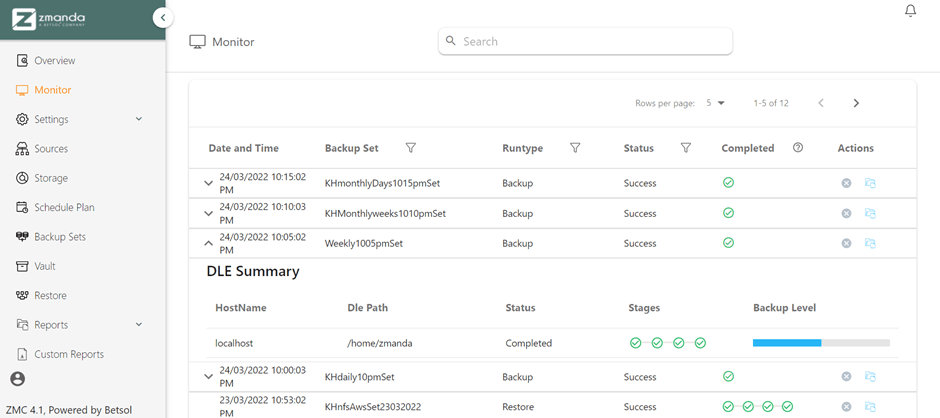
To prevent movement between numerous tabs, view the current state of the backup and other such details through ZMC’s comprehensive display in the Monitor page.
Concise information of the carried out Backups:

Detailed Summary of the respective Backup Set selected:
Vaulting
ZMC offers our users the ability to carry out secondary backups. The storage of mission-critical data in an offsite location to abide by the 3-2-1 Backup Rule is facilitated through vaulting. Apart from aggrandizing the safety of the existing backed-up data, this feature enables users to back up their data to another storage form.
Please note that vaulting in ZMC supports secondary backups in three levels, with three different backup run ranges. The backup types include Full, Incremental, and the third type that combines the two. The Backup Range allows our user to choose a time frame or timestamp to select the appropriate backup set image.
The vaulting feature requires the pre-installation of a license on the Zmanda server, without which its functionality is void.
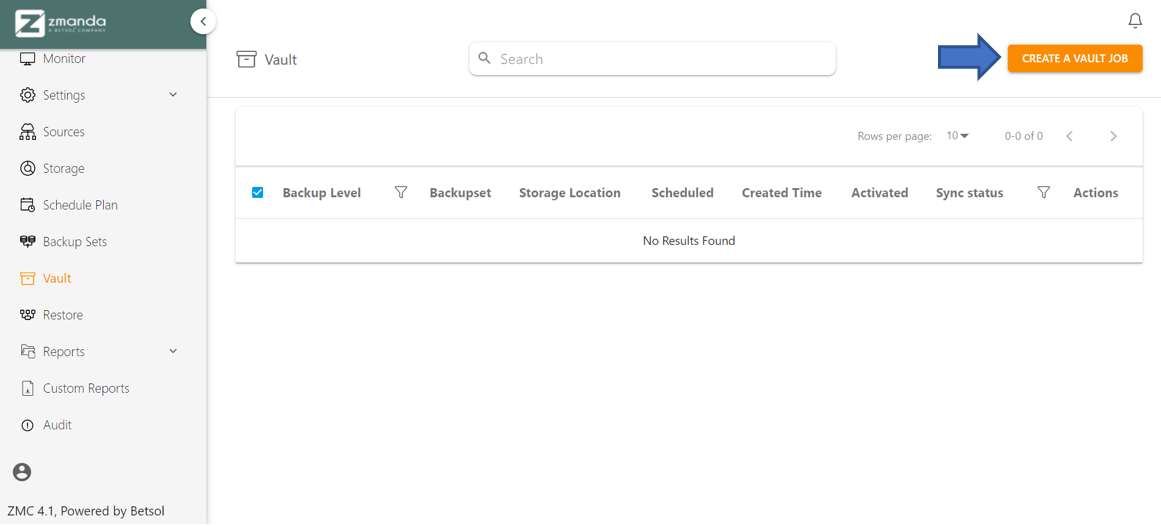
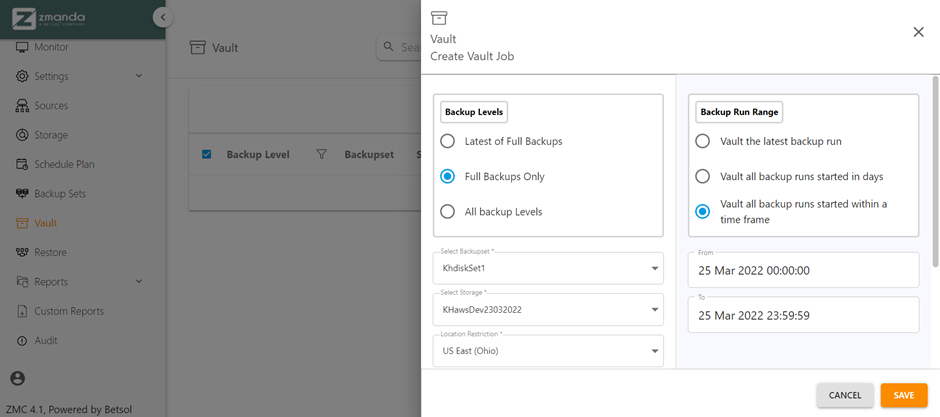
Steps to create a vault job:
1. Click on the ‘Create a Vault Job’
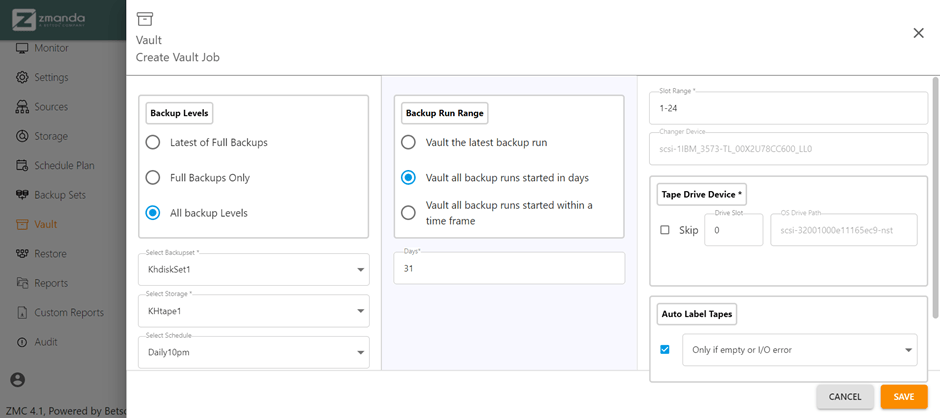
2. Configure the Vault Jobs settings
Example 1: The Latest of Full Backups option is selected to backup data under the level of Full Backups that have been carried out recently to a tape storage device:

Example 2: The All backup Levels option is selected to backup data belonging to all types of backup, namely Full or Incremental. The Backup Run Range has an option of mentioning the number of days under which the backup should have occurred.
Example 3: The data belonging to the different Backup Levels can be stored in any type of storage such as Cloud, HardDisks etc. In the below example, cloud storage is used to store the data.
Restoring data
This page is used to retrieve backed-up data from the end storage device with ease. Analogous to the Backup Sets page, this page comprises four steps to carry out a customized and successful restoration.
1. Restore What
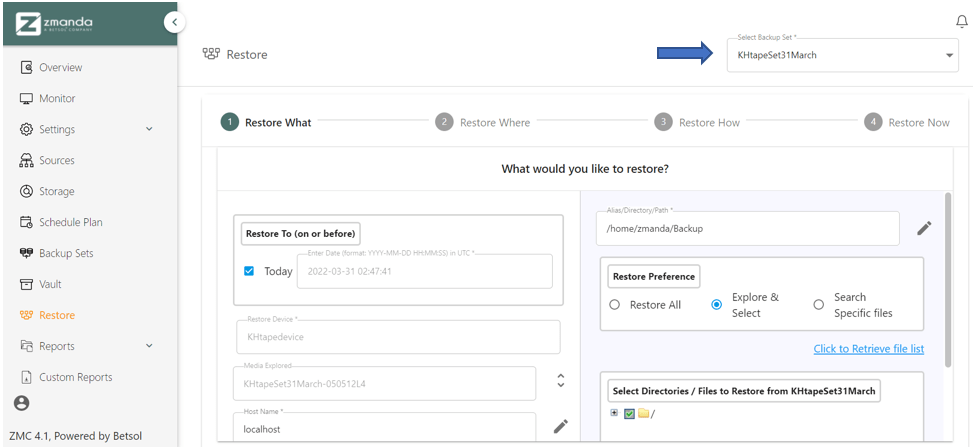
The Restore What page includes the selection of parameters for three primary fields, namely Select the Backup Set, Host Name & Directory Path, and the Restore To option.
Step 1: Choose the Backup set
The backup set from which data is retrieved for restoration is selected.
Step 2: Configure the timeframe using Restore To
The Restore To option enables our users to either backup the latest image, i.e., by selecting the today option or by mentioning a timestamp to retrieve the backup image pertaining to that date.
Step 3: Choose the corresponding Host Name
All storage devices contain DLE (disk list entries), used to identify a backup by the source machine’s hostname and its respective pathname. Here, the Host Name field refers to the source machine’s hostname from which data backup occurred.
Ensure to key in the Host Name that accurately matches the name mentioned during the creation of the Backup Set on the Backup What page.
Step 4: Mention the Alias/Directory/Path from which data is retrieved
Similarly, this field pertains to the path at which the data is present for restoration, as mentioned by the DLE, and with respect to the source machine specified in the above field.
Ensure to key in the path that accurately matches the path mentioned during the creation of the Backup Set on the Backup What page.
Step 5: Choose the appropriate Restore Preference that best suits the requirements
- Restore All – Restore the entire backup image present at the mentioned path.
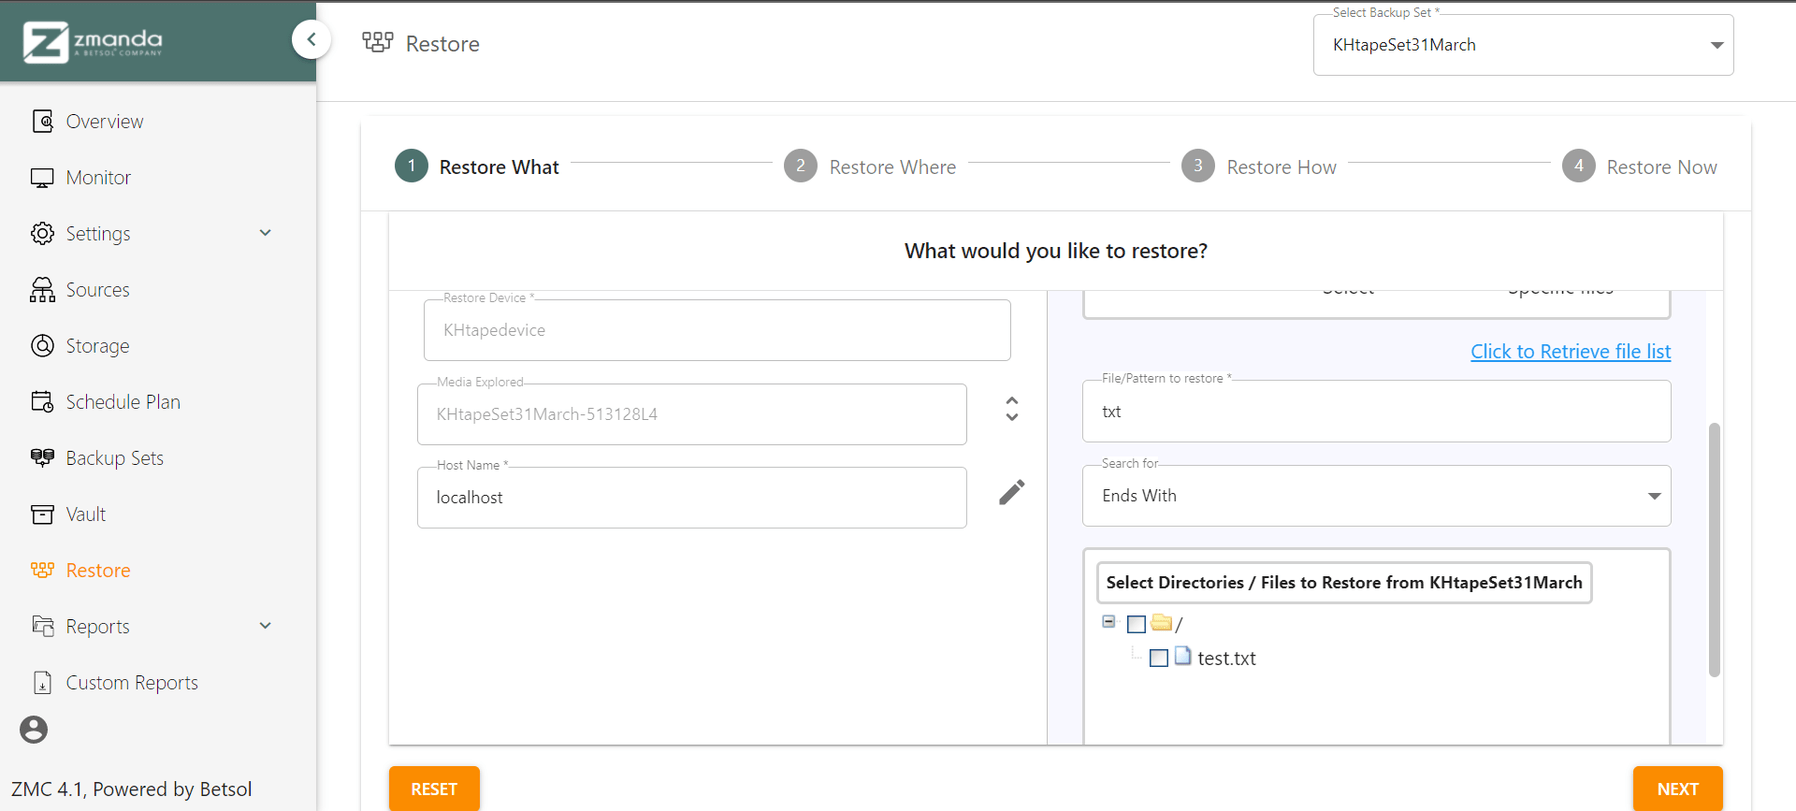
- Explore & Select – Click on the Click to Retrieve file list hyperlink to view the entire directory structure present at the previously mentioned alias/directory/path. On the generation of the directory structure, expand it wherever necessary by clicking the + symbol preceding the folders. Choose the required files, images, etc., for restoration.
- Search Specific files – In the File/Pattern field, specify the pattern against which the names of the various files are compared and chosen if matched accurately. Search for is used to describe the position at which the pattern must be present.
On completion, click on the Next button.
2. Restore Where
The Restore Where page allows the user to configure the settings of the data restoration’s location. Similar to the staging process seen in the backing up of data, a temporary staging process takes place during restoration. The location for this is mentioned explicitly, or the default value is used.
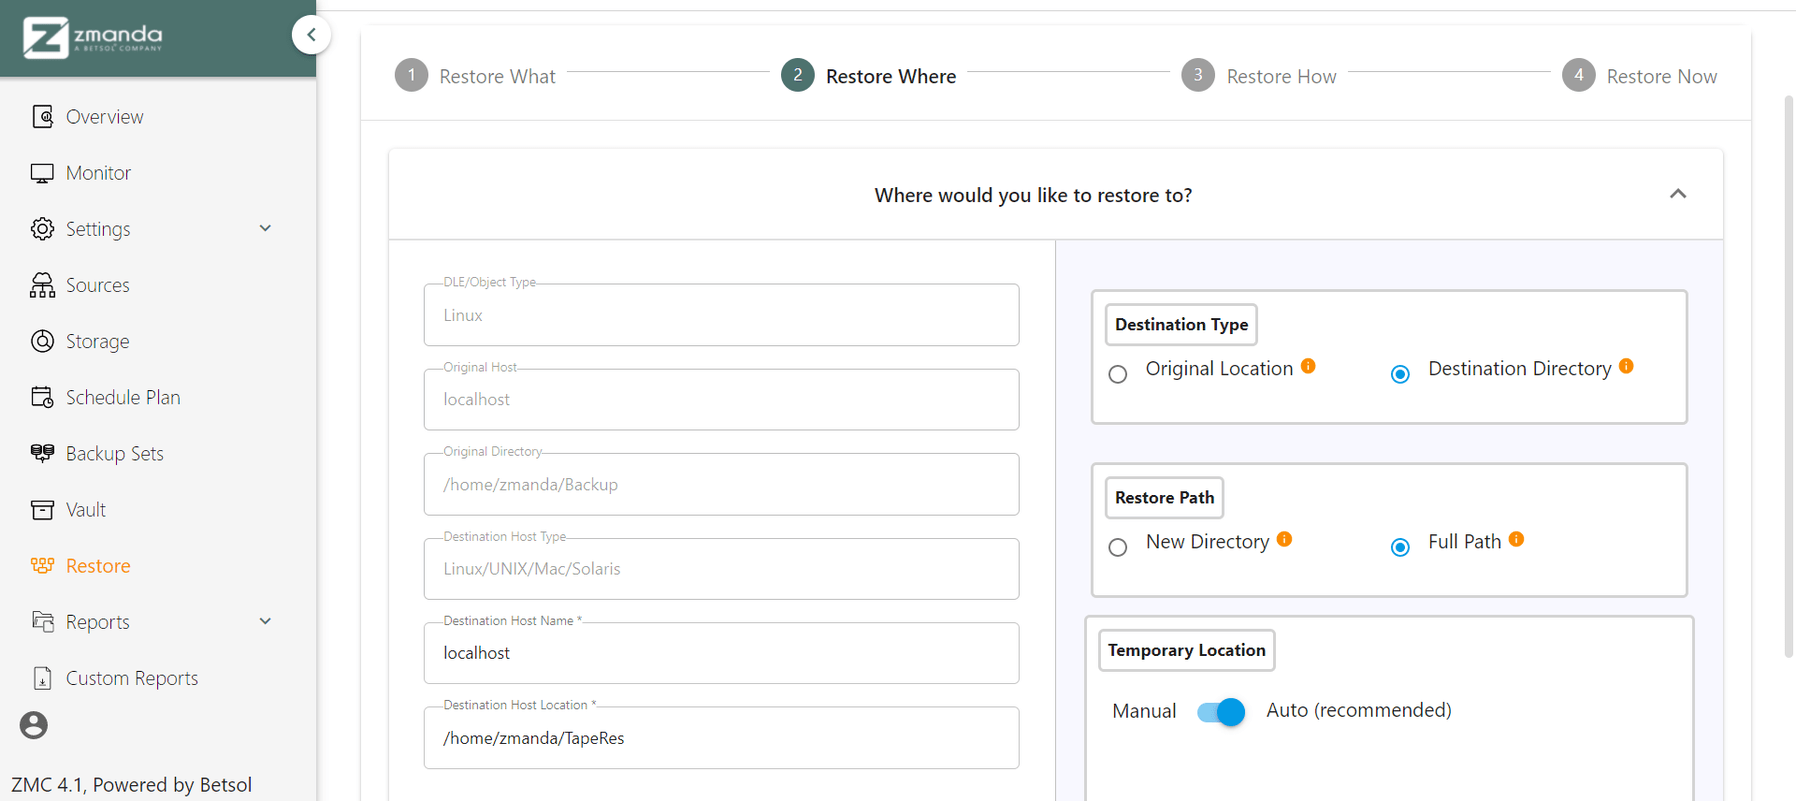
- Destination Host Name – This field specifies the destination machine’s hostname. The data is restored to this machine.
- Destination Host Location – This field specifies the path inside the destination machine at which a folder is created, consisting of the restored data.
- Temporary Location – This location is temporarily used by ZMC during the restoration process. Please ensure that this location has the capacity to support the entire backup image.
On completion, click on the Next button. Navigate to the previous page at any time by clicking the Back button.
3. Restore How
ZMC ensures to mitigate possible discrepancies that may arise during the restoration process. The Restore How page configures the settings related to the various conflicts that may occur during the restoration.
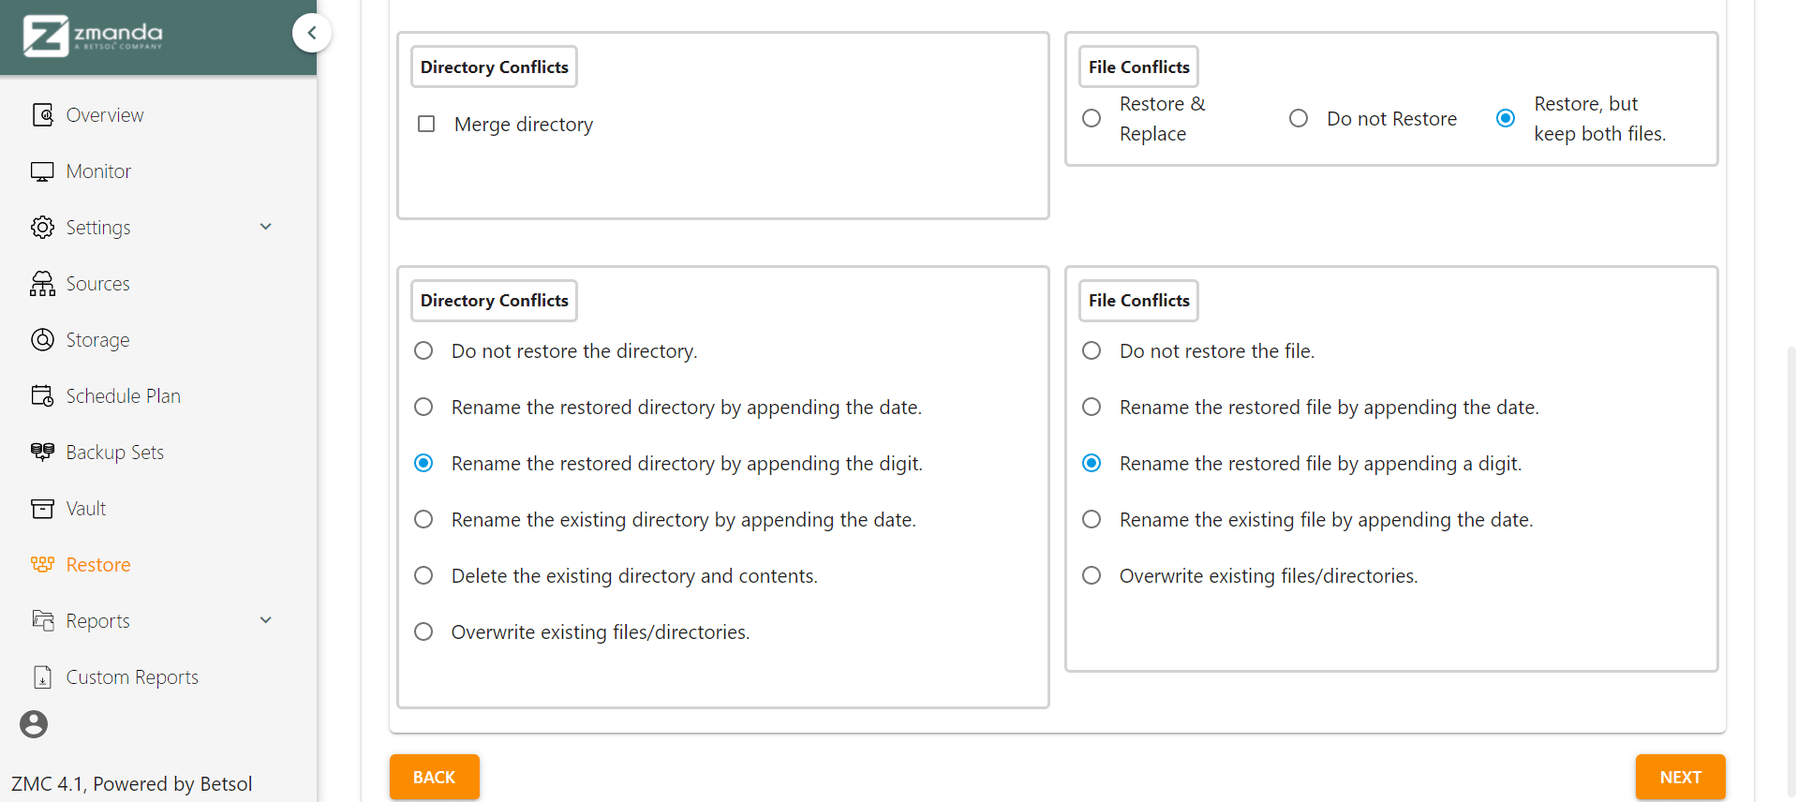
On completion, click on the Next button. Navigate to the previous pages at any time by clicking the Back button.
4. Restore Now
The Restore Now page displays all the settings that the user has configured. On clicking the Green Play button, the restoration process commences.
Ensure to load the tapes into the tape changers or in their respective slots if the data to be restored are present in tape storage.

On completion, click on the Save button. Navigate to the previous pages at any time by clicking the Back button.
ZMC Reports
ZMC records all the crumbs of information regarding the backups, and hence our users can obtain exhaustive reports containing all possible information. Thus, to view the details and statistics of ongoing backups, completed backups, vault jobs, or information regarding restored data, ZMC reports are the easiest way to do so. The report consists of standard fields of information that encompass salient details regarding any chosen event.
1. To view a particular ZMC Report:
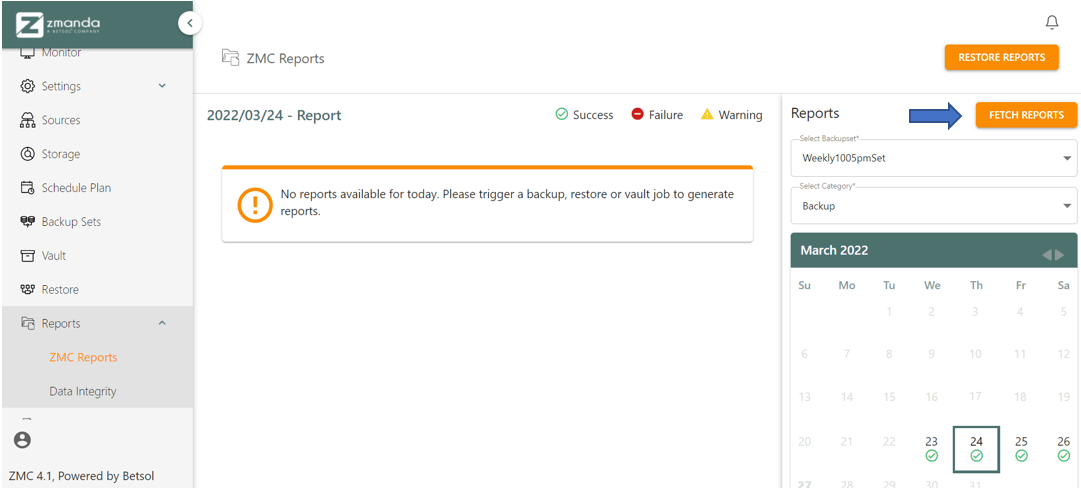
Choose the Backup Set and the respective category (Backup, Vault, or Flush) of the report and click on the Fetch Reports button to generate the required ZMC report. Use the calendar present in the bottom right to choose the date for which the report is to be generated.
Flush Option- The staging process that occurs during the backing up of data includes the concept of flushing. When the destination storage device or host machine has a limited capacity or if data can only be written into it once, flushing is used. During flushing, the data is retained at the staging location until a certain threshold value is reached, after which data is written to the end storage device. This facilitates the efficient utilization of end storage devices.
2. On generating the ZMC report, expand it by clicking on the drop-down arrow and view the detailed ZMC report:
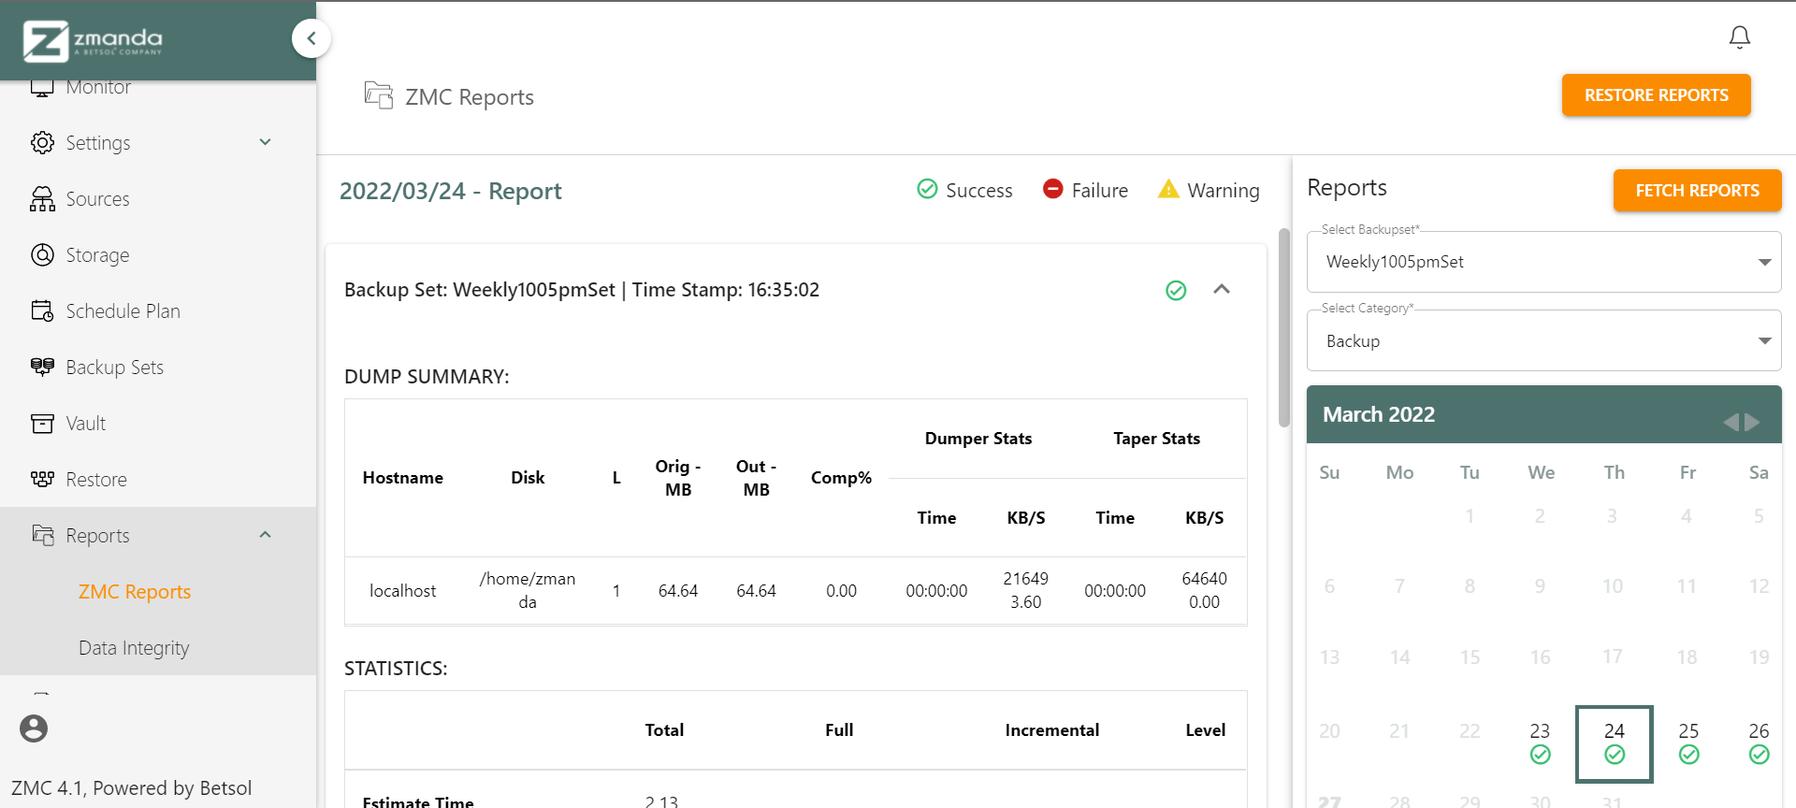
On scrolling down through the report, you can find meticulous details and statistics about the entire procedure and the usage of the tape storage, its media label, etc. (Only applicable if the end storage is of type Tape Storage).
Data Integrity
ZMC recognizes the importance of data integrity, a predominant feature and information that it offers to all its clientele with absolutely no cutbacks. As mentioned in our previous blogs, all storage devices are entitled to distinct properties that set them apart but face a few inevitable security issues. Tape storage is one such end storage device that may fall prey to tampering, be subjected to suboptimal weather conditions, unforeseen human intervention, viruses, etc. Hence, users can view the integrity of their data present in the tape storage and allow them to make informed decisions about its restoration.
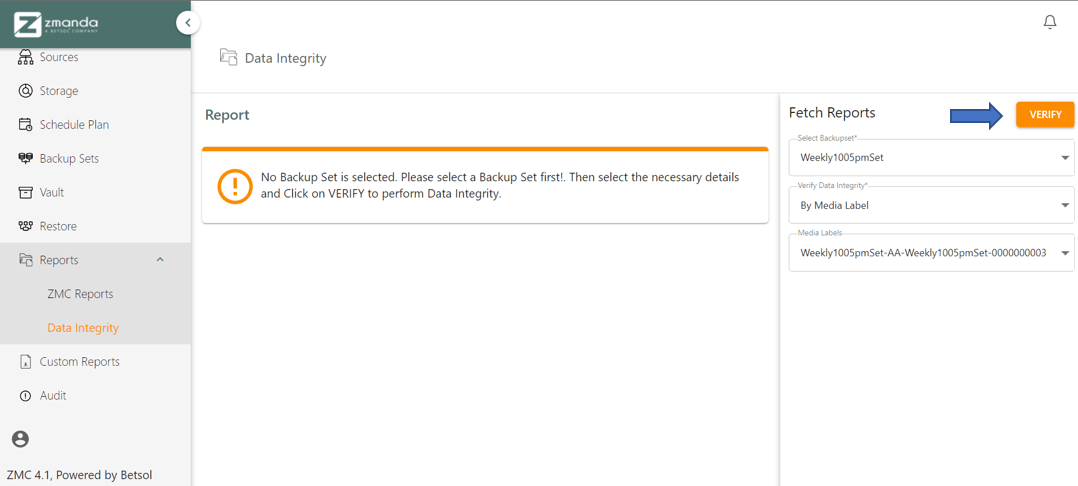
There are two options to view data integrity – media label and date.
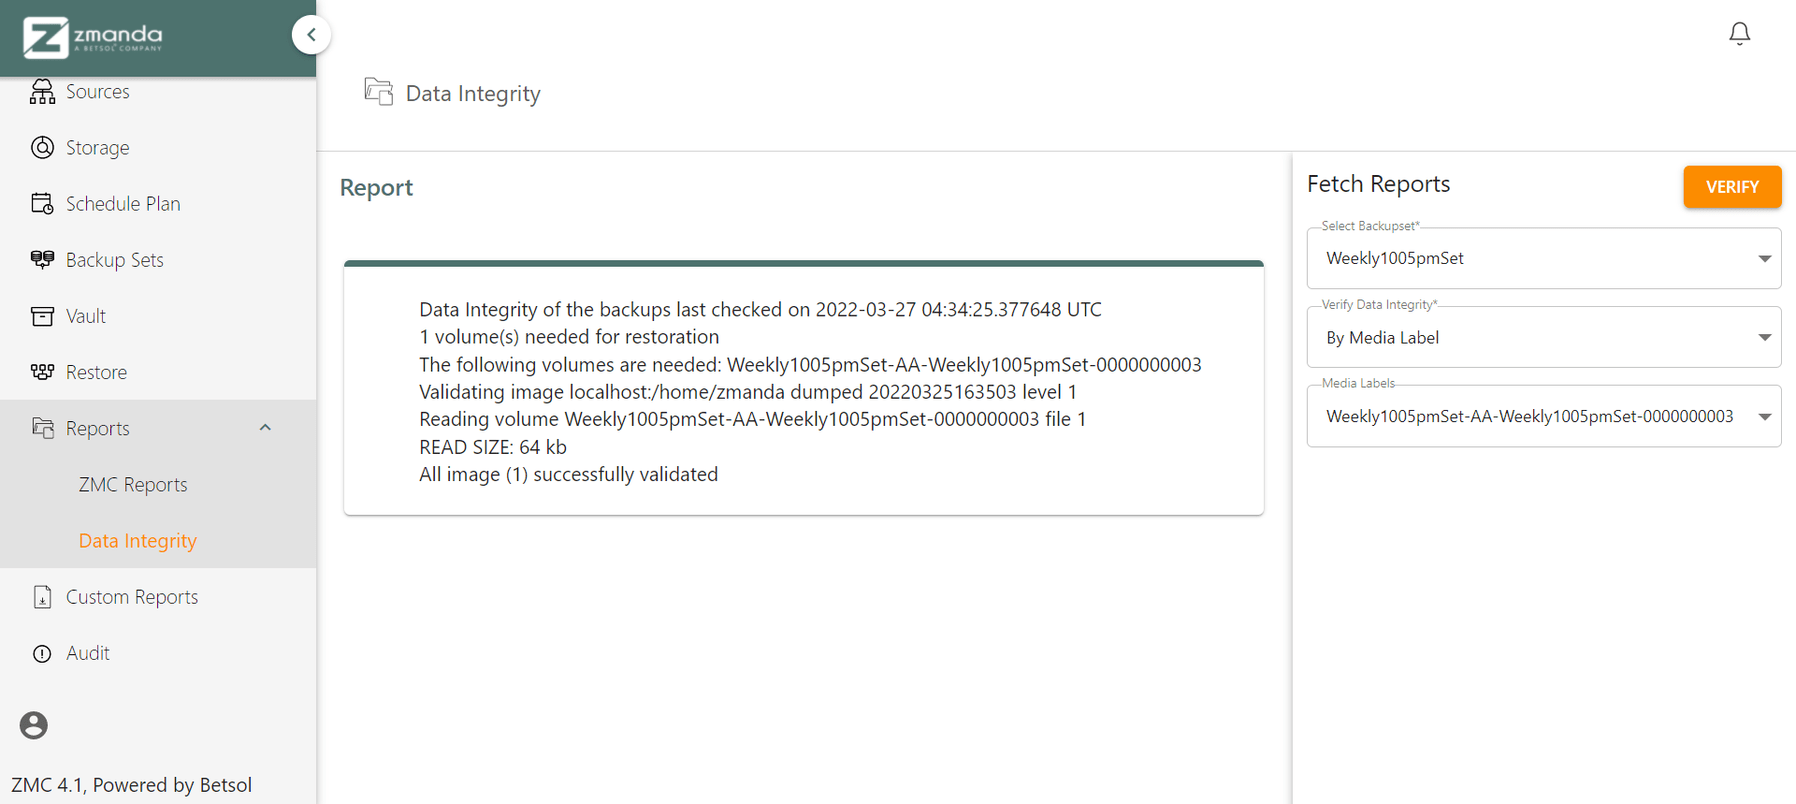
Data Integrity by Media Label:
This option allows the user to choose the tape volume by its label and check the data integrity of the media image present in the same.
Data Integrity statistic:
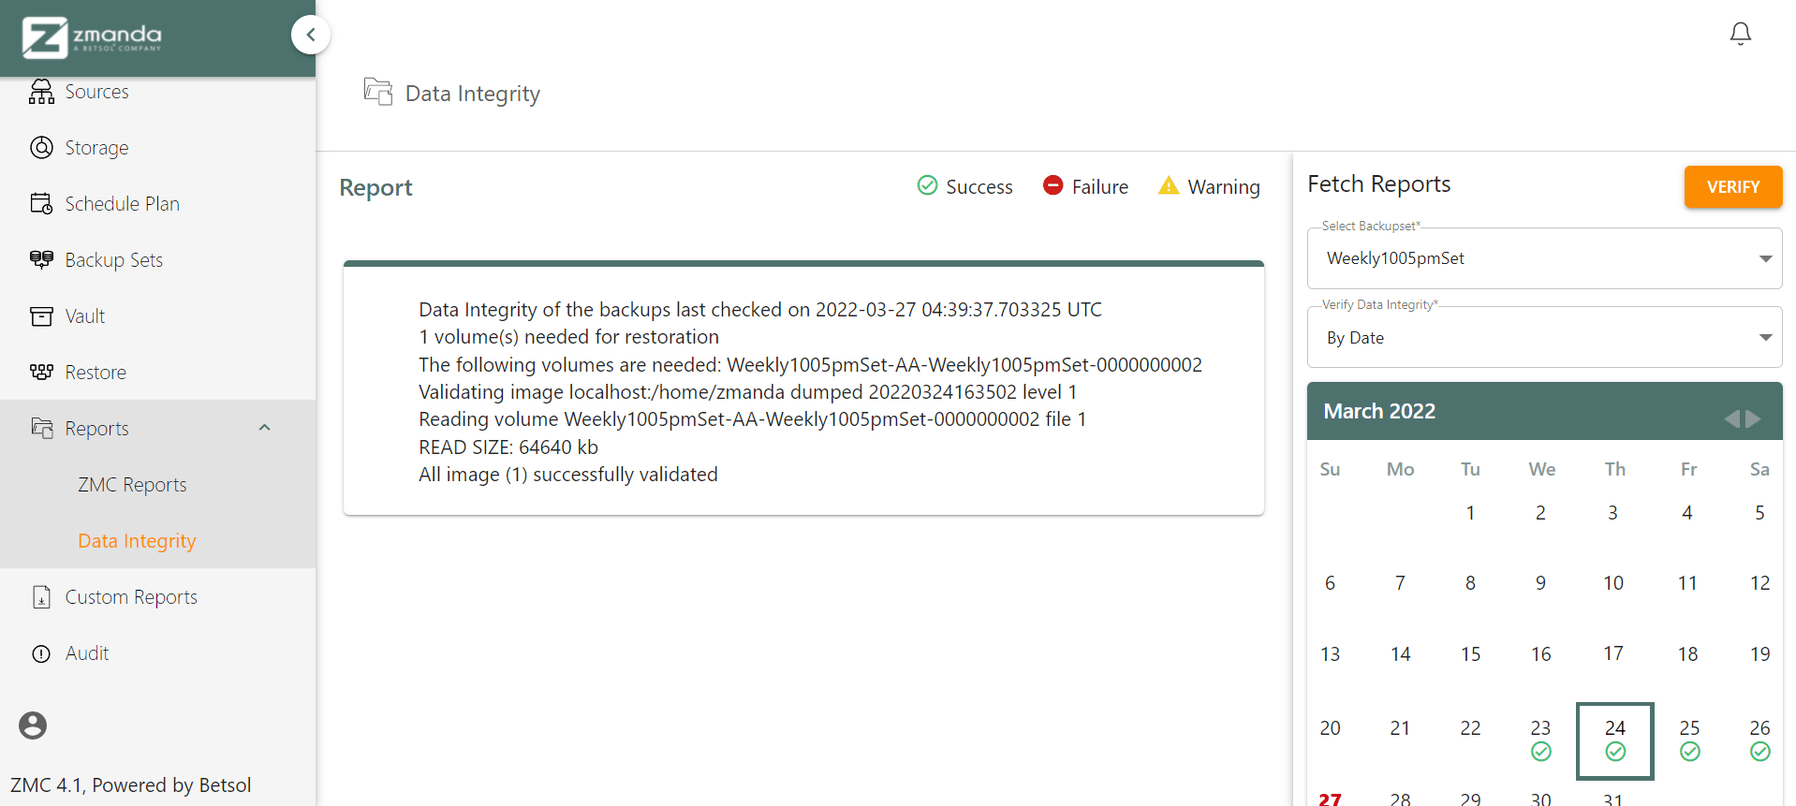
Similarly, the By Date option checks the integrity of the data present in the Backup Set selected on the particular date. You can select the data with the help of the calendar panel present at the bottom right.
Custom Reports
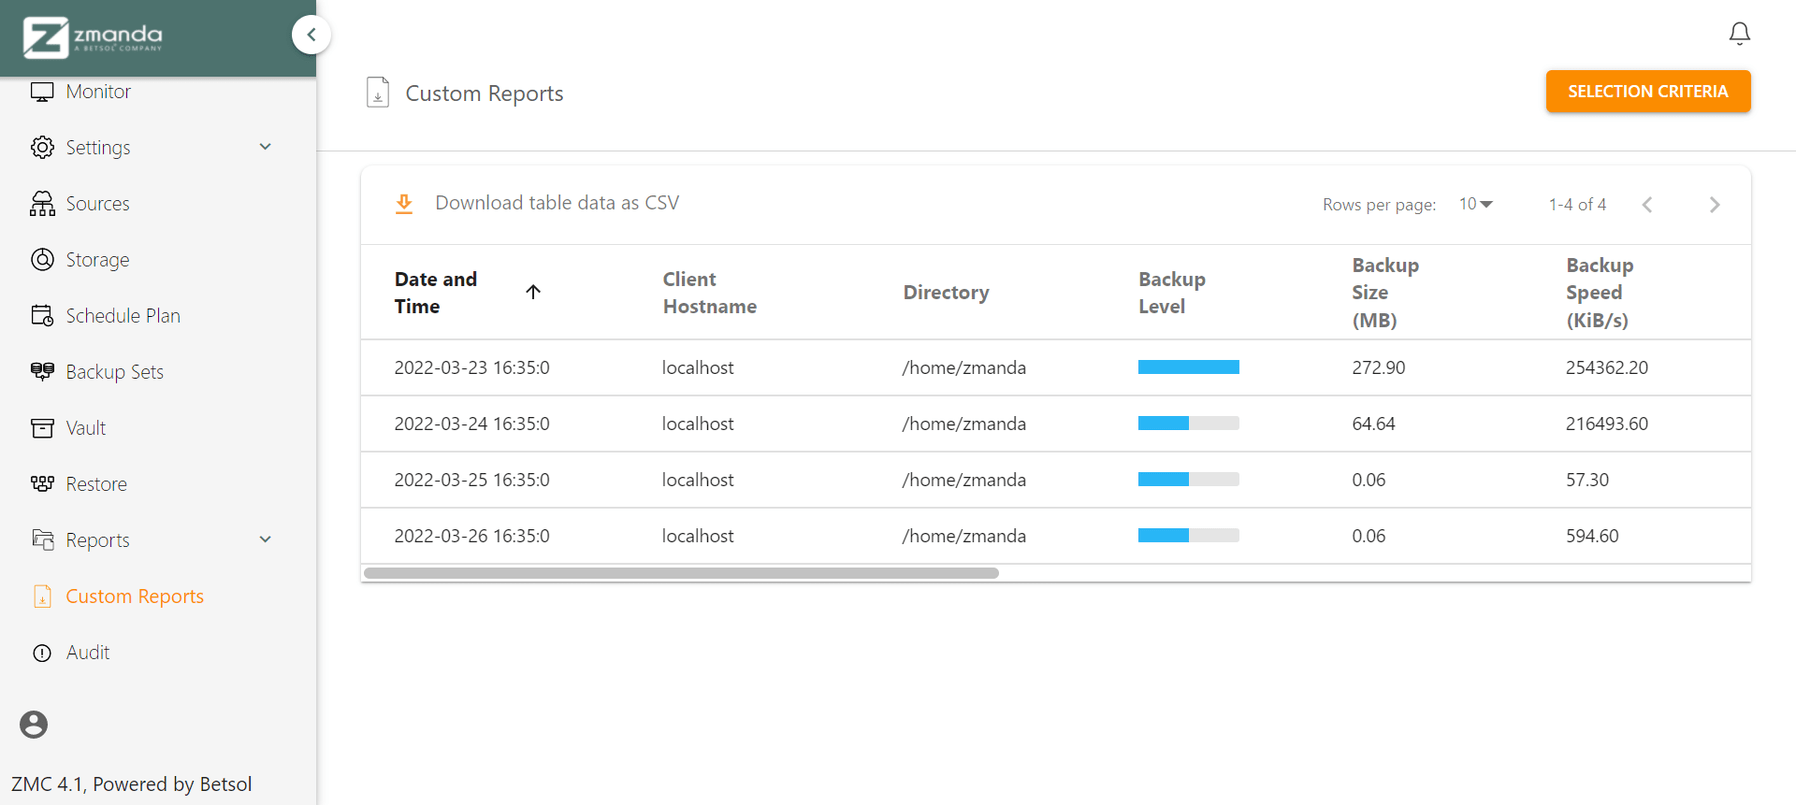
ZMC stores all the information about the backups, such as data backup speed, the time elapsed, backup size, etc. While ZMC reports offer a rigid report format, it also provides a unique feature of creating a custom report that consists of hand-picked parameters and attributes to be displayed. This additional functionality allows you to custom-make your backup reports to best suit your requirements.
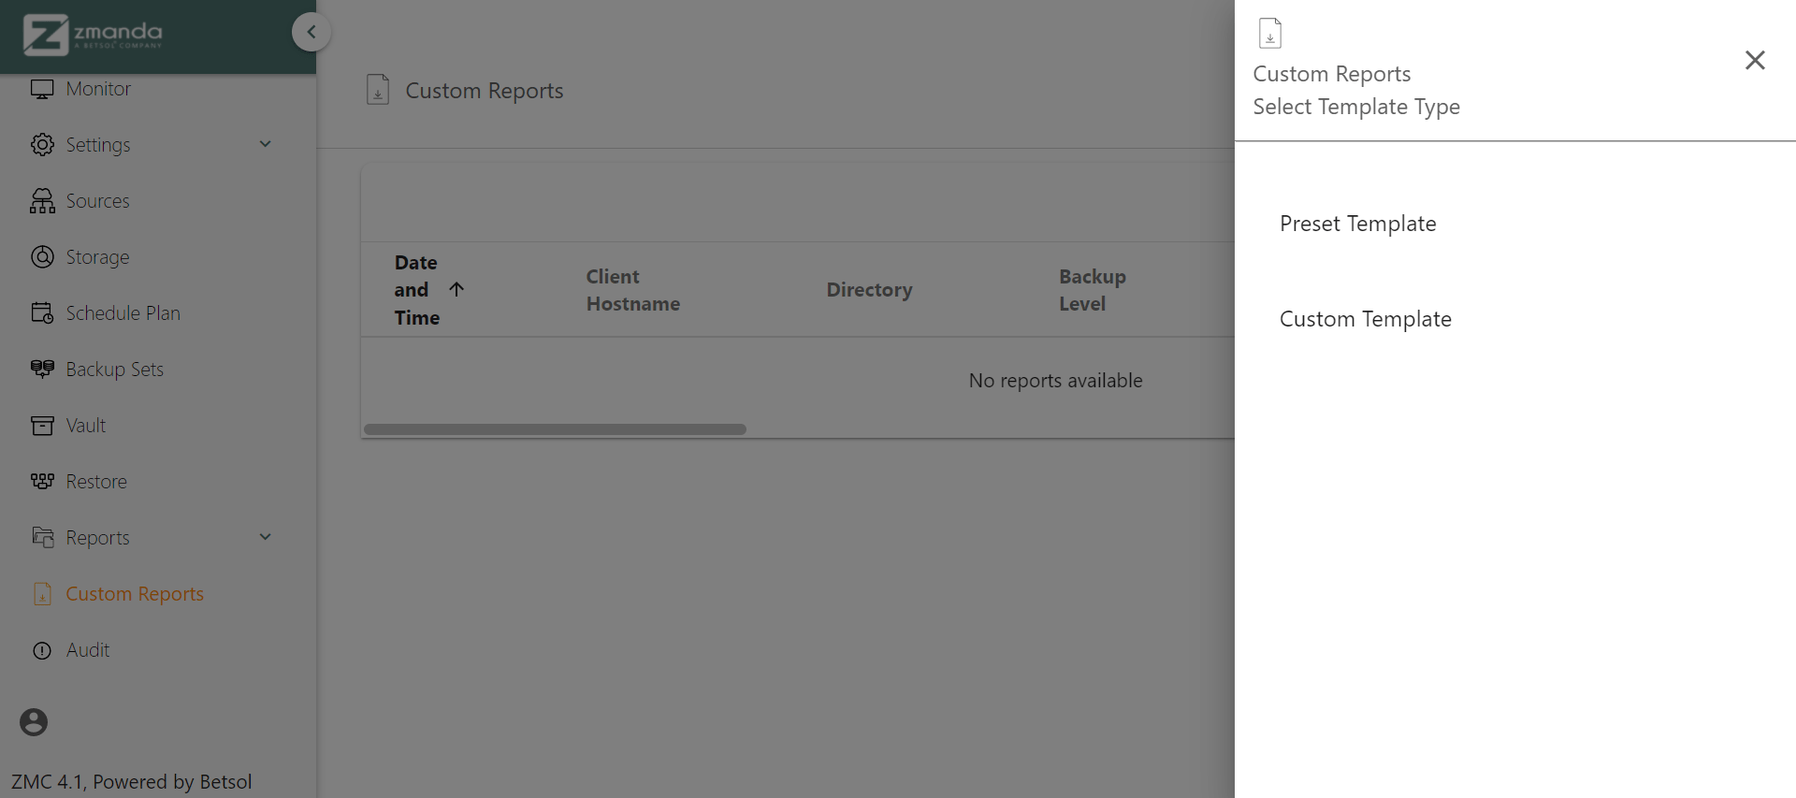
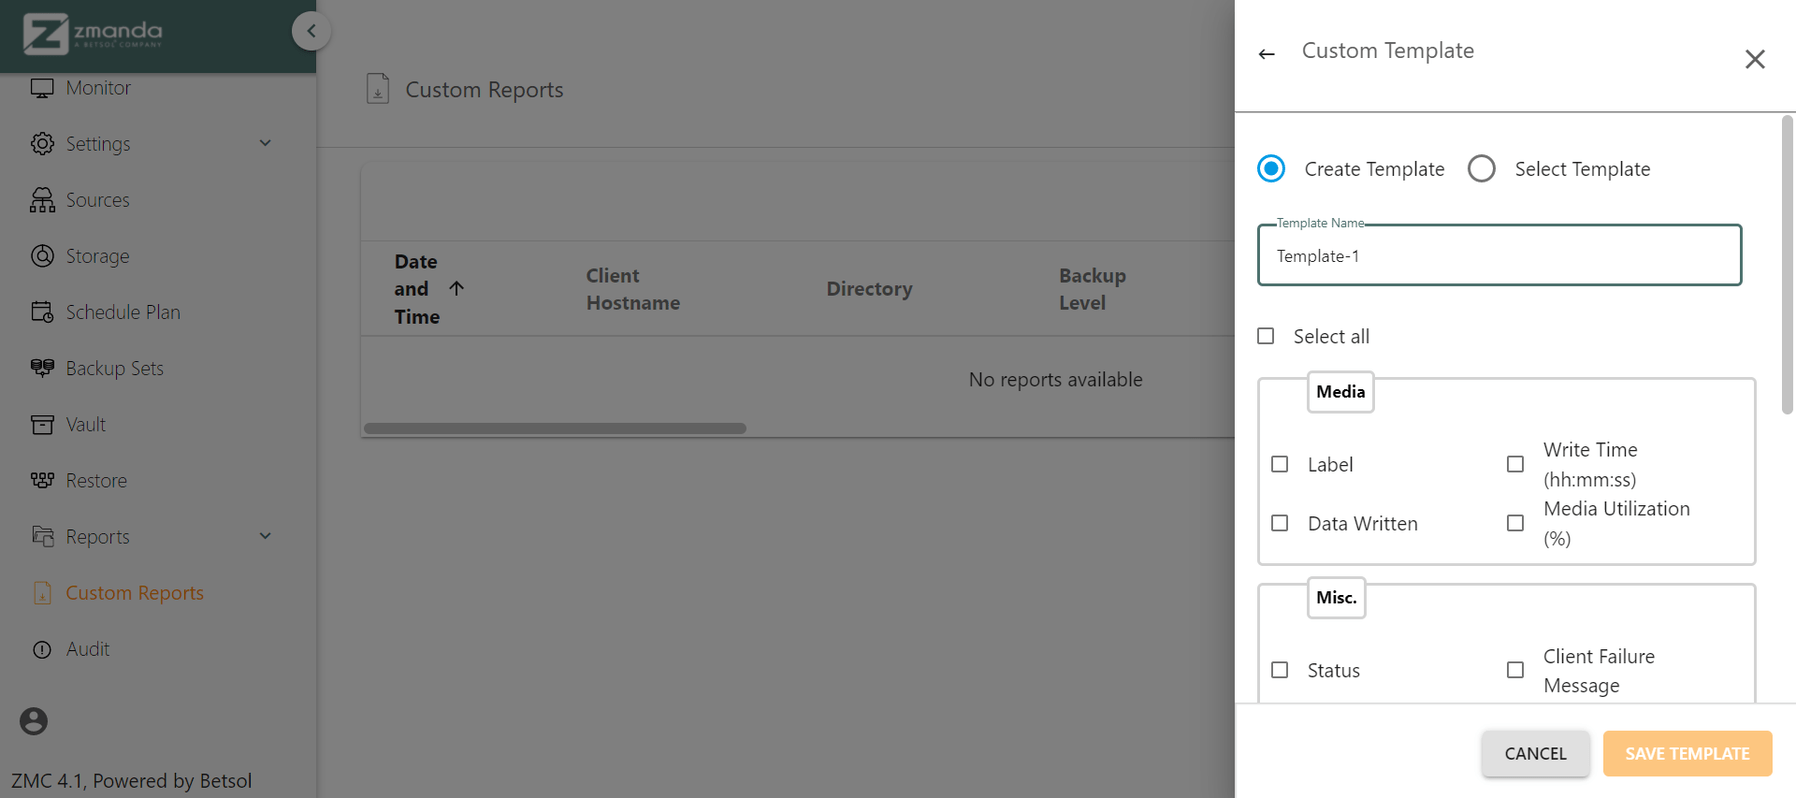
1. Create a customized template:
The Preset Template option is used to choose between various in-built templates. The Custom Template option is used to create a template of your choice and use it to generate the report.
Designate a name for the template and choose the parameters that would be a part of this custom template. On completion, click on the save template button, and the template will now be available for use.
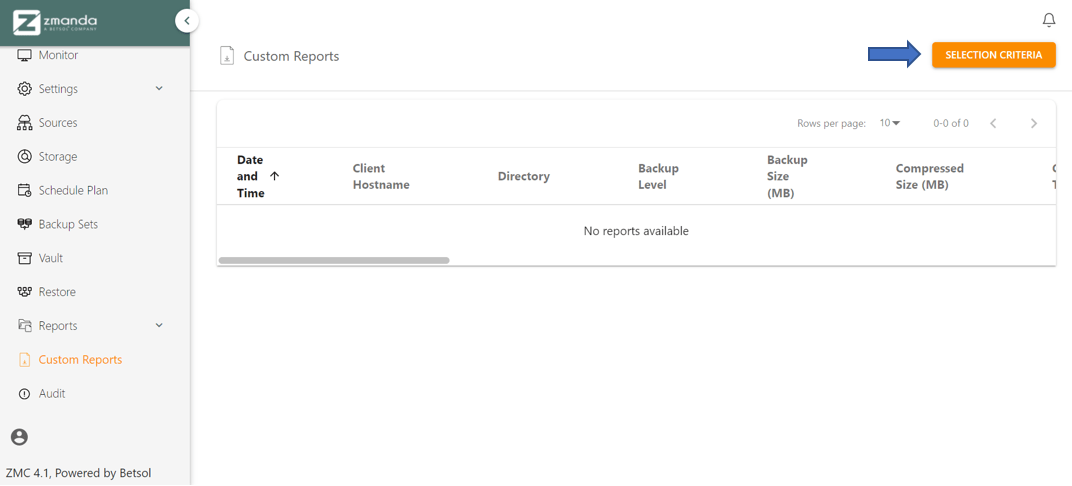
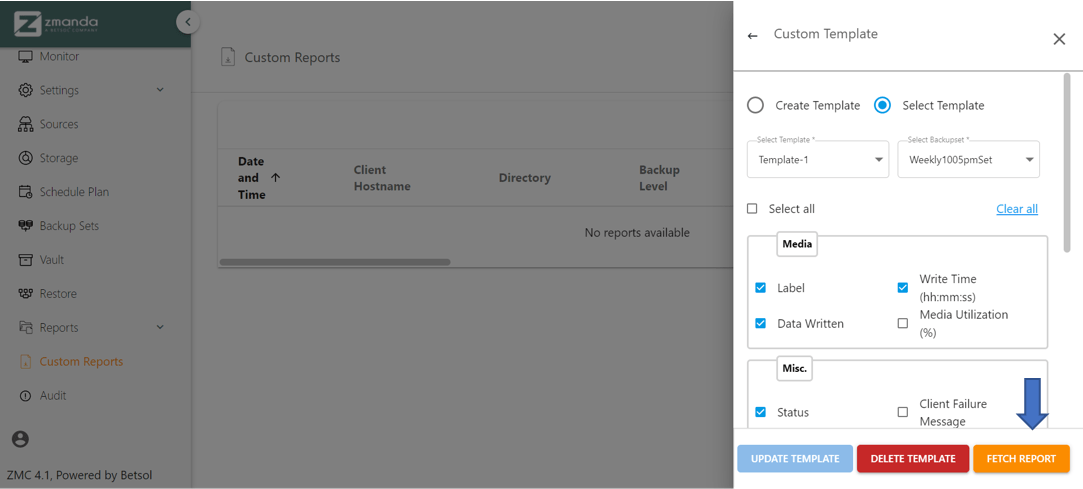
2. Using the customized template:
To use the customized template, click on Selection Criteria → Custom Template → Select Template. In doing so, choose one of the custom templates created and the backup set for which the report is under creation.
Done & Dusted!
And there you have it, ZMC’s superpowers and their essence have been unravelled for making the best use of them. For further assistance and information regarding any parameter or page, please visit Zmanda Docs or reach out to our technical support staff to receive expert assistance.